Unit testing aspnet core 2.1

With the release of dotnet core 2.1, a lot of things came together. Things like signalr and dependency injection. No more fighting the version numbers. Trying to get the exact version of signalr to work with the other exact version of dotnet runtime and so on.

Now, when things settled down, let’s get testing to work.

In this this post, I make a note to self about how to mock enough stuff to make unit testing to work.

Project here

Setup

Here, I create three projects. The web, the definitions and the repository.
Ah, and the additional Test project.

So, fire up the good old command line and type

md demo
cd demo
dotnet new sln --name Demo
dotnet new mvc --name Demo.Web
dotnet new classlib --name Demo.Definitions
dotnet new classlib --name Demo.Repositories
dotnet new classlib --name Demo.Models
dotnet new xunit --name Demo.Tests

and now (if you are using Visual Studio 2017 proper) you would like to add them to the solution

dotnet sln add Demo.Web
dotnet sln add Demo.Definitions
dotnet sln add Demo.Repositories
dotnet sln add Demo.Tests
dotnet sln add Demo.Models

And don’t forget to reference Definitions from Repository and so on with

cd Demo.Web
dotnet add reference ..\Demo.Definitions\Demo.Definitions.csproj
dotnet add reference ..\Demo.Repositories\Demo.Repositories.csproj
cd ..\Demo.Repositories
dotnet add reference ..\Demo.Definitions\Demo.Definitions.csproj
dotnet add reference ..\Demo.Models\Demo.Models.csproj
cd ..\Demo.Models
dotnet add reference ..\Demo.Definitions\Demo.Definitions.csproj
cd ..\Demo.Tests
dotnet add reference ..\Demo.Definitions\Demo.Definitions.csproj
dotnet add reference ..\Demo.Models\Demo.Models.csproj
dotnet add reference ..\Demo.Repositories\Demo.Repositories.csproj
dotnet add reference ..\Demo.Web\Demo.Web.csproj

In this case I have a homecontroller that need the repository injected for data access and also need access to the signalr hub for push notifications to the web.

I’ll begin by creating the interfaces, models and repository.
Next, I’ll inject the repo in the HomeController. I’ll also inject the HubContext for the NotificationHub.

private readonly IRepository _repo = null;
IHubContext<NotificationHub> _hubContext = null;
public HomeController(IRepository repo, IHubContext<NotificationHub> hubContext)
{
       _repo=repo;

}

For this to work we register the interface in the DI-container in Startup.cs

In the ConfigureServices method we add

services.AddTransient<IRepository, CustomerRepository>();
So, now it works and the customer Acme is shown when browsing /Home/Customer/1

Testing

For testing purposes I’ll use the DependencyInjection, FluentAssertions and Moq nuget packages.
cd Demo.Tests
dotnet add package Microsoft.Extensions.DependencyInjection -v 2.1.0
dotnet add package FluentAssertions
dotnet add package Moq

For easy access to signalR and other stuff that the web project use add also the same package the webapp is using Microsoft.AspNetCore.App

dotnet add package Microsoft.AspNetCore.App -v 2.1.0

DependencyInjection and aspnetcore are interdependent and need to be of the same version.

So, In my first test I need to mock the repository

var repo = new Mock<IRepository<ICustomer>>();
repo.Setup(x => x.GetById(1)).Returns(() =>
{
    return new Customer{Id = 1, CustomerName = "Acme", CreatedOn = DateTime.Now};
});

This means that when call GetById with parameter 1, the anonymous function sent as a parameter to Returns is executed.

Furthermore, in my HomeController action UpdateCustomer I’m executing a call to the signalr hub NotificationHub.

await _hubContext.Clients.All.SendAsync("ReceiveMessage", customer);

This has to be mocked in three steps. First a mock of _hubContext that is of type IHubcontext<NotificationHub> that, when the property Clients is requested, returns an IHubClients object. This, in turn, must mock its All property to return an IClientProxy.

Since they are referencing each other we have to mock them in reverse.

var mockClientProxy = new Mock<IClientProxy>();

var mockClients = new Mock<IHubClients>();
mockClients.Setup(clients => clients.All).Returns(mockClientProxy.Object);

var hub = new Mock<IHubContext<NotificationHub>>();
hub.Setup(x => x.Clients).Returns(() => mockClients.Object);

Then register these objects in the IoC container

var provider = new ServiceCollection()
    .AddSingleton <IRepository<ICustomer>> (repo.Object)
    .AddTransient<HomeController, HomeController>()
    .AddSingleton<IHubContext<NotificationHub>>(hub.Object)
    .BuildServiceProvider();

Now when I calls for my test subject, HomeController, The IoC container resolves the dependencies

var controller = provider.GetService<HomeController>();
As a bonus we can add some cookies if your controller need them
controller.ControllerContext.HttpContext = new DefaultHttpContext();
controller.ControllerContext.HttpContext.Request.Headers.Add("Cookie", "userid=mchammer;recordno=2");

Then just to the assert

var albumc = await controller.UpdateCustomer(customer);
albumc
   .Should()
   .BeAssignableTo<OkObjectResult>()
   .Subject.Value
   .Should()
   .BeAssignableTo<Customer>()
   .Subject
   .CustomerName
   .Should()
   .Be("Acme");

This example is admittedly quite construed (I’m testing the mock 🙂 ) but serves the purpose to show the mocking of both a signalr hub internals and then stack them together plus injecting the dependencies into the container.

Stream error in the HTTP/2 framing layer

When using R for posting json to a web api I got the error

Error in curl::curl_fetch_memory(url, handle = handle) :
Stream error in the HTTP/2 framing layer

But only after the first successful run. Strange. Something was hanging the handle in the background. Or that was my guess at least.

Anyway, if I set the version back to HTTP/1.1 it works fine.

Here is the gist of it


library("httr")
httr::set_config(config(http_version = 2)) # set the HTTP version to 1.1 (none, 1.0, 1.1, 2)
sendMail <- function(e){
body <- list(secret = 'sfsdf£$4500dfdd__$$', body=e["message"]) # create a list that will be serialized to JSON
result <- POST(url = "https://prod-10.westeurope.logic.azure.com/workflows/8934jadajada999&quot;
, body = body , encode = "json", handle = NULL)
}
myProcess <- function(){
stop("error")
}
tryCatch(myProcess(), error = sendMail)

view raw

errorhandler.R

hosted with ❤ by GitHub

Adding authentication in AspNetCore 2.0

<EDIT> A few days ago they changed it again….
Instead of .AddCookieAuthentication(….
It’s now just .AddCookie();
</EDIT>

Or rather Aspnetcore 2.0.0-preview2-006497 since they changed it again….

First, download the latest bits from .NET Core 2.0 and install it.
Open a developer command prompt and check version with

dotnet –version

It should say 2.0.0-preview2-006497 for you to be sure that my instructions will work 🙂
Create a new folder for your project and create a new mvc project with

dotnet new mvc

After it is done we will add the dependencies for authentication

dotnet add package Microsoft.AspNetCore.Authentication -v “2.0.0-preview2-final”

and

dotnet add package Microsoft.AspNetCore.Http -v “2.0.0-preview2-final”

Now we add, one by one the authentication providers we want. In Startup.cs in ConfigureServices:


services.AddAuthentication(options =>
{
options.DefaultAuthenticateScheme = CookieAuthenticationDefaults.AuthenticationScheme;
options.DefaultSignInScheme = CookieAuthenticationDefaults.AuthenticationScheme;
options.DefaultChallengeScheme = CookieAuthenticationDefaults.AuthenticationScheme;
})
.AddCookieAuthentication(CookieAuthenticationDefaults.AuthenticationScheme, option =>
{
option.LoginPath = "/home/login";
})
.AddTwitterAuthentication(o =>
{
o.ConsumerKey = Configuration["Authentication:Twitter:ConsumerKey"];
o.ConsumerSecret = Configuration["Authentication:Twitter:ConsumerSecret"];
});

view raw

add-auth.cs

hosted with ❤ by GitHub

The biggest change in this version is perhaps that you only add

app.UseAuthentication();

To the pipeline in the Configure method.

So. Done with that part. Oh, forgot the usings. Add these to the top


using System.Security.Claims;
using Microsoft.AspNetCore.Authentication.Cookies;
using Microsoft.AspNetCore.Http;
using Microsoft.AspNetCore.Authentication;
using Microsoft.AspNetCore.Rewrite;
using Microsoft.AspNetCore.Mvc;

view raw

using.cs

hosted with ❤ by GitHub

A few more than necessary but I will get to them. Now the project should start with

dotnet run

But it still allows for anonymous access.

Add the attribute [Authorize] to your HomeController together with a matching using like so:


using Microsoft.AspNetCore.Authorization;
namespace [namespace].Controllers
{
[Authorize]
public class HomeController : Controller
{

view raw

controller1.cs

hosted with ❤ by GitHub

So. Again start the project and browse to http://localhost:5000/. You will be redirected to /home/login and get an error since that page does not exist (yet).

In the HomeController.cs add this code


[AllowAnonymous]
public async Task<IActionResult> Login(string username, string password)
{
if (IsValidUser(username, password))
{
var claims = new List<Claim>(2);
claims.Add(new Claim(ClaimTypes.Name, username));
claims.Add(new Claim(ClaimTypes.Role, "GroupThatUserIsIn",
ClaimValueTypes.String, "IHaveIssuedThis"));
await HttpContext.SignInAsync(
CookieAuthenticationDefaults.AuthenticationScheme,
new ClaimsPrincipal(new ClaimsIdentity(claims,
CookieAuthenticationDefaults.AuthenticationScheme)));
return RedirectToAction("Index");
}
return View();
}
private bool IsValidUser(string username, string password)
{
return username == "foo" && password == "bar";
}

This is used when you manage all the users and passwords yourself (please don’t).
But seriously, sometimes you have an old back-end system that you are building a new front-web for and it has all the user info.

I created a super simplistic view for this action. Create a new file in the folder Views/Home called Login.cshtml with this content


<form action="/home/login" method="post">
<input name="username" />
<input name="password" type="password"/>
<input type="submit" value="Go"/>
</form>
<a href='/login-twitter' \">I prefer Twitter</a>

view raw

Login.cshtml

hosted with ❤ by GitHub

Told you. Simplistic. Make sure these “usings” are in place in your HomeController.cs


using Microsoft.AspNetCore.Authorization;
using System.Security.Claims;
using Microsoft.AspNetCore.Authentication.Cookies;
using Microsoft.AspNetCore.Http;
using Microsoft.AspNetCore.Authentication;

Now, go back up to the project root folder and run the application again. This time the login page is displayed. If you try to login with your hard coded username and password you will be logged in and redirected to /. If you inspect the ClaimsPrincipal when debugging you will see that your claims are visible under the Identity-property.

cookieinfo

Great. Let the user logout as well.


public async Task<IActionResult> Logout()
{
await HttpContext.SignOutAsync(CookieAuthenticationDefaults.AuthenticationScheme);
return RedirectToAction("Index");
}

Add a link somewhere that redirects the user to /home/logout. Done.

So. How about Twitter?

First, add a new app at apps.twitter.com . Click “Create new app” and fill out the form. You can set callback url to localhost:5000. Go to the Keys and Access Tokens-tab and copy them to your appSettings.json file


},
"Authentication": {
"Twitter": {
"ConsumerKey": "<Your key here>",
"ConsumerSecret": "<Your secret here>"
}
}
}

Please note that if you intend to publish the code somewhere, don’t store these credentials here. Use secrets instead.

Remember the fancy looking login page? The Twitter-link was /login-twitter. Just because it is fun I will hard-wire this url into the processing pipeline.

So. Head over to Startup.cs and paste this code into the Configure-method.


app.Map("/login-twitter", login =>
{
login.Run(async context =>
{
await context.ChallengeAsync("Twitter", new AuthenticationProperties() {
RedirectUri = "/" });
return;
});
});

view raw

Startup.cs

hosted with ❤ by GitHub

Now you redirected to a Twitter page and depending if you are already logged into Twitter or not the page either asks you to logon or only to authorize your new app to connect to Twitter.

Tip: If you want to dress the current user with more claims than Twitter sent, you can always add them. Like your internal user id of that Twitter-identified user.


public async Task<IActionResult> Index()
{
var principal = User.Identity as ClaimsIdentity;
var idClaim = principal.Claims.Where(i => i.Type == "https://marcusclasson.com/claims/id&quot;)
.SingleOrDefault();
if(idClaim == null)
{
principal.AddClaim(new Claim("https://marcusclasson.com/claims/id&quot;, "MyCustomId"));
await HttpContext.SignOutAsync(CookieAuthenticationDefaults.AuthenticationScheme);
await HttpContext.SignInAsync(User);
}
return View();
}

Code on Github

Done.

Xamarin: error APT0000: Error parsing XML: syntax error

This error had me hunting for two whole days. I couldn’t understand where the files Xamarin was complaining about. They were certainly not mine….

I noticed that when I backgraded to Xamarin.Forms v1.5.1.6471 the problem disappeared. After fiddling around desperately (as you do) a pattern emerged. The trick seemed to be to not reference the support libraries Xamarin.Android.Support.* that had versions > 23.0.1.1.

As soon as they were referenced, the build crashed and I had bad xml in my resourcecache in the obj folder.

obj\Debug\resourcecache\DA97546C26E54413F6BB75B0531999D2 \res\anim\abc_fade_in.xml(2): error APT0000: Error parsing XML: syntax error

Specifically the files were Android source files. E.g. res/anim/abc_fade_in.xml or res/anim/abc_slide_out_top.xml.

How does this work? Well, when you add a nuget package either explicit (as with Xamarin.Forms) or implicit (as its dependencies) they are downloaded to your packages folder in your solution. When you build your solution, these are unpacked and cached in /Users/<username>/AppData/Local/Xamarin folder. One subfolder per reference and version. Like so:

AppData\Local\Xamarin\Android.Support.v7.AppCompat\23.0.1.3\embedded\res

This is were the bad xml came from. As it happended, Xamarin managed to download the full structure of the source files but failed (silently mind you) to download the content of some of them.

This was the content of one of the files (values-land.xml)

badxml

Ah, finally – the error messages really made sense now.

Since these folders only works as a cache, the solution was easy. Delete them.

I deleted the folder at component-level, i.e. AppData\Local\Xamarin\Android.Support.v7.AppCompat. When I did a new build in Visual Studio it downloaded a fresh copy and my build worked.

I of course had to do a clean solution first to get rid of the bad xml in obj\resourcecache.

The pitfalls of LINQ deferred execution

Let’s face it, we all love the simplicity of Linq. The fluent syntax, the easy to read – almost sql-like – syntax. However, there are som pitfalls that I’ve seen colleagues fall into unknowingly. One of them is what is called  the deferred execution.

By design, you don’t execute a Linq command, you only specify it. The execution is not performed until the result is required. Hence deferred.


Take a look at the following code


//Prepare test data. Could be a set returned
//from a database query
var list = new List<int>();
for (int i = 0; i < 1000000; i++)
{
list.Add(i);
}
//Filter out a small subset of the data [zip code, annual income]
var listSmall = list.Where(i => i > 100000 && i < 150000);
//Now use the small subset and loop through it
//E.g. examine the first 1000 rows
var result = new List<int>();
for (int i = 0; i < 1000; i++)
{
int _i = listSmall.Where(o => o == 100100 + i).Single();
result.Add(_i);
}

view raw

gistfile1.cs

hosted with ❤ by GitHub

Albeit a bit contrieved it is not an unusual pattern. I have a large list that i narrow down to a subset that I would like to work on (zip codes, gender) and then I examine this subset by looping through it.

On my machine this took 15000 ms (I’ve removed the Stopwatch stuff for clarity). This is not reasonable even though we have 1,000,000 records.


The reason is that listSmall is not a list (yet)! It is just a defined query. So, every time we execute

listSmall.Where(o => o == 100100 + i).Single()

we are, in fact, executing

list.Where(i => i > 100000 && i < 150000).Where(o => o == 100100 + i).Single()

So, instead of going through 50,000 records a 1000 times, we are searching 1,000,000 records! Not what we intended indeed. The way to solve this is to force Linq to execute the initial filter. The easiest way to do this is to simply append ToList() at the end. Like so:

var listSmall = list.Where(i => i > 100000 && i < 150000).ToList();

Now, the code runs in 400 ms. That’s what I call improvement.


Another scenario that has it cause in the same Linq feature. Inspect the following code


//Prepare test data. Could be a set returned
//from a database query
var list = new List<int>();
for (int i = 0; i < 1000000; i++)
{
list.Add(i);
}
//Prepare a list to hold the results
//E.g list of all users born a certain year
var listOfInts = new List<IEnumerable<int>>();
for (int i = 0; i < 10; i++)
{
//Select from the large list all users
//that satisfy the criteria
listOfInts.Add(list.Where(a => a == i));
}
//Now, loop through all years and select the
//first user for every year
foreach(var l in listOfInts)
{
Console.WriteLine(l.First());
}

view raw

gistfile1.cs

hosted with ❤ by GitHub

Here we have a recordset that contains a lot of users and I want to select and group all users from specific years. I loop through the set and select the users. I then store the result in an array. Imagine my surprise when I later loop through my yearbook and see that all users are from the same year. What happended?

Well, since I didn’t, actually, retreive the users in the first loop but only specified the query, when I finally did execute the query the loop is done and i == 0. Through closure, i is visible to my query snippet and is used to select users but – by then – it is 10.


The solution is once again to force execution by appending ToList() to the where statement at row 15.

Happy LINQing.

Debugging your iOS application with Fiddler

Many times I find myself in a situation where I need to monitor the http traffic from my apps. Normally – no problems – just go to Network settings -> Ethernet -> Advanced -> Proxy -> Check the http proxy and enter the address and port number of your fiddler instance.

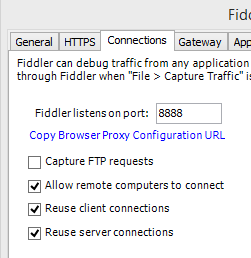
Oh, and of course, your fiddler instance has to allow remote clients like so:

fiddlersettings2


However, when you want to connect through https, things are getting problematic. At least in the simulator. For the real device? No problemo. Just set the same setting for the proxy as above, and then browse (in Safari) to ipv4.fiddler:8888. This will open a web page generated from fiddler with a link to the certificate needed to allow Fiddler to act as man in the middle. Tell iOS to trust and install the certificate and you are good to go.

So. Now. The simulator has no network settings since it is using your Mac as a gateway. This means that when you’ve set your Mac to use Fiddler as a proxy, your simulator will too.

But when your code use the network stack, let’s say through NSURL, an exception will occur. The error will be something like

ERROR Error Domain=NSURLErrorDomain Code=-1202 “The certificate for this server is invalid. You might be connecting to a server that is pretending to be “xxx.azure-mobile.net” which could put your confidential information at risk.” UserInfo=0x7526530 {NSLocalizedDescription=The certificate for this server is invalid. You might be connecting to a server that is pretending to be “xxx.azure-mobile.net” which could put your confidential information at risk., com.Microsoft.WindowsAzureMobileServices.ErrorRequestKey=<NSMutableURLRequest…

A nice, man-in-the-middle warning. DON’T GO THERE! However, since we actually want this scenario let’s make the simulator trust the certificate. The information about this is stored in a sqlite database in your ~/Library.

So, head over to ~/Library/Application Support/iPhone Simulator/<version>/Library/Keychains.

The you’ll find the TrustStore.sqlite3 database. If you’ve installed SQLiteManager, just doubleclick on the file. You’ll see a table (the only one) called tsettings. Before iOS 5 you just needed the SHA1 (of your certificate) as the lookup key and you were good to go. Not so anymore. Lucky for us there are plenty of Python scripts that will do this for us. Head over to Github and download iosCertTrustManager.py. Put it in /usr/local/bin.

Done? Good. Before we can use the script we have to get our hands on the actual certificate. Open, on your Mac (make sure it’s still in proxy mode), http://ipv4.fiddler:8888  and click on the certificate link and install it on your Mac. Now, open your KeyChain and find the certificate, right-click and export it as a PEM-file. Remember where you saved it.

Open a shell.

Execute

“chmod +x /usr/local/bin/iosCertTrustManager.py”

to allow execution. Now simple execute

iosCertTrustManager.py -a <path-to-the-certificate>/DO_NOT_TRUST_FiddlerRoot.pem”

assuming you kept the default name of the certificate. It will now start to ask questions like “.. import to v5.0?, v6.0?” and so on. Just answer yes to all of them.

Done….

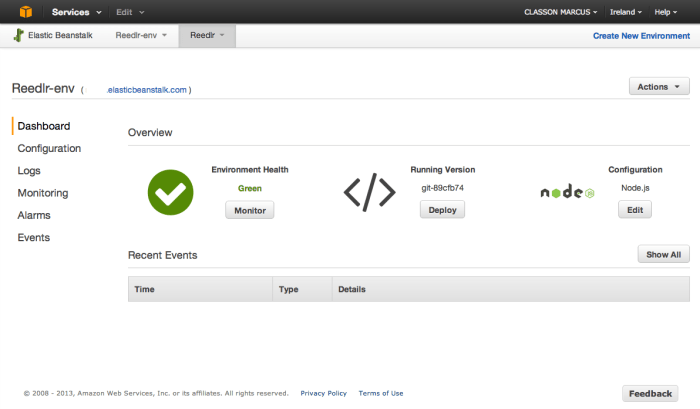
AWS Elastic Beanstalk console receive major overhaul

Well, this facelift was long over due. With the launch of Microsoft Azure some two years ago, the Amazon Web Services console looked dated over night. It still does to some extent. I haven’t had the time to dig deeper, but I will.

This war in prices, usability and features will make the future for services look really nice and shiny.

Here a look of the new console

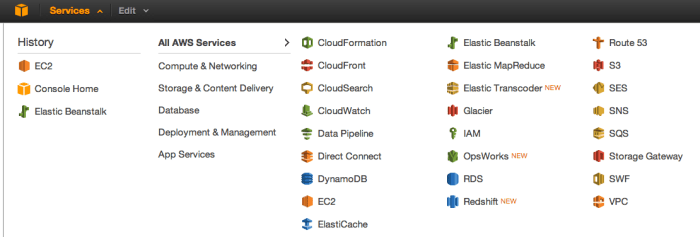
Amazon Web Services monitoring Amazon Web Services dashboard

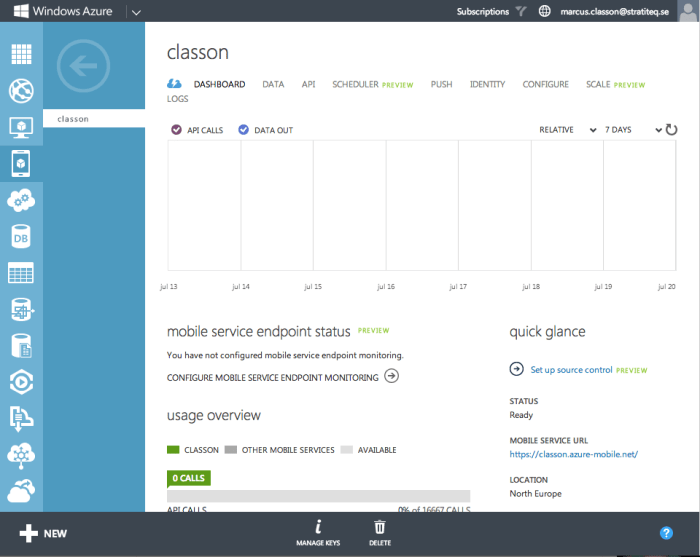
I still think Azure looks more modern. But as I said, I’ll dig deeper. Perhaps brush up my Node.js project…

management console for azure


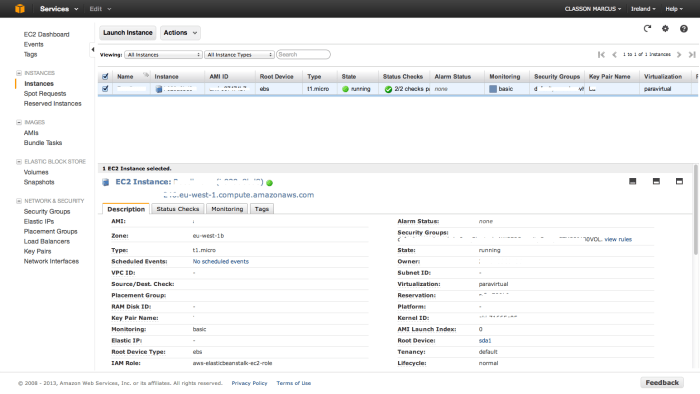
However, to get access to the underlying Elastic Compute Cloud (EC2) instances you still have to use the old, messy, interface at EC2.

Amazon Web Services EC2So, Microsoft is ahead in the GUI category but AWS is waaay ahead when it comes to features.

awsfeatures


Avoid memory leaks in .NET

This is something that often bites new developers. “There can be no memory leaks in a garbage collected runtime”. Well, perhaps not in theory, but in real life under the wrong circumstances there will.

Ok, not memory leaks in the terms original meaning, unreferenced memory, but memory you thought you got rid of but it hangs around never the less.

In my experience it mostly happens when we use either Events or Timers. The scenario for events is likely a view-driven application where we pop views in and out of existence. During the lifetime of the view it likely have to respond to events from the host window. Events like “the user clicked the save-button” or similar.

So, during initialization of the view it hooks up to the ev_Save-event in the host. Later, when the user switch view, you drop the reference to the old view and replace it with another one. Gone. Right?

No, the view you just disposed clings on for dear life to the event, and is not eligable for garbage collection.

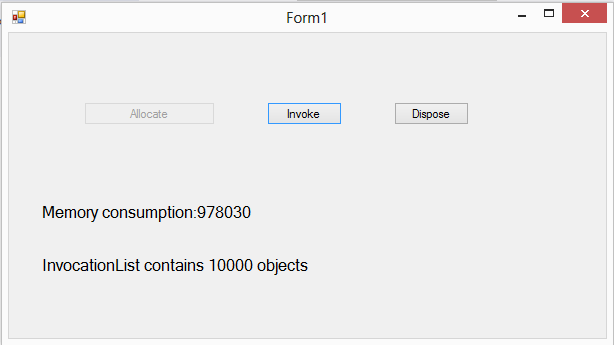
I have a class representing the view called Worker. I simulate adding 10000 views and then print out the memory consumption.

for (int a = 0; a < 10000; a++)
{
new Worker(this);
}
memoryLabel.Text = "Memory consumption:" + GC.GetTotalMemory(true)/1024;
view raw gistfile1.cs hosted with ❤ by GitHub

Note that I’m not saving any references to it. Much like just adding it to the current view. I’m passing in a reference to the hosting window which the client uses to hook up all of the events for interacting with the user.

The constructor of the client “view” just hooks up the fake “save”-event. The heavy byte array is just to make the leak more visible in Task Manager.

private readonly byte[] bLoad = new byte[99999];
HostWindow _host;
public Worker(HostWindow host)
{
_host = host;
host.ev_Click += HostEventTriggered;
}
view raw gistfile1.cs hosted with ❤ by GitHub

When I press the button invoking the “save”-event I can see that my array of listeners contains all the 10000 objects.

private void TriggerChildObjects(object sender, EventArgs e)
{
countLabel.Text = "InvocationList contains " +
(ev_Click == null?0:ev_Click.GetInvocationList().Length) + " objects";
}
view raw gistfile1.cs hosted with ❤ by GitHub

Remember I didn’t keep any references to the clients. But rather, the client kept a reference to the host.

leakyLook at this amazing piece of software 🙂

Anyway, to my surprice I hit 10000 save-events instead of the one on the screen.

The easiest way to mitigate this is to make sure the client unsubscribes to all events before you loose it. The perhaps cleanest way to do this is to implement the IDisposable interface and then, during the view-switching, invoke the Dispose()-method.

I simulate this in my handler for the “Dispose”-button

private void Dispose(object sender, EventArgs e)
{
if (ev_Click == null)
return;
foreach (var w in ev_Click.GetInvocationList())
{
using (var x = w.Target as IDisposable)
{
x.Dispose();
}
}
countLabel.Text = "InvocationList contains " + (ev_Click == null ? 0 : ev_Click.GetInvocationList().Length) + " objects";
memoryLabel.Text = "Memory consumption:" + GC.GetTotalMemory(true) / 1024;
}
view raw gistfile1.cs hosted with ❤ by GitHub

A comment on calling GC.GetTotalMemory(true). When you pass true, the runtime will perform a full GC before returning the memory numbers.

Also, you will not get all that memory back. I.e. it will not drop to its original size. The application will keep the allocation, but regard it as usable. So when you click on allocate again after pressing Dispose, you won’t get an OutOfMemory exception. This is just the way .NET works

This scenario is, as I mentioned above, very common in Silverlight- and WinForm applications. Perhaps you are using MEF or Jounce or any other helper library that makes the tedious view plumbing go away. But it might also make you think that all this is automagically taken care of.

It is not.

Sample project here

Reading a Windows Azure Service Bus queue from .NET

This is the second part in a multi part blog post where the previous part is here:

  1. Part 1

We have  a couple of message in the queue. Let’s pull them out. This is the design of these objects we did in the previous post:

postman3

This is simulating a mobile application that can place orders of some kind.

To easily deserialize these into POCOs we create the container classes like this:

[DataContract]
class Order
{
public DateTime CreatedOn { get; set; }
public List<OrderRow> Orderrows { get; set; }
}
[CollectionDataContract]
class OrderRow
{
[DataMember]
public string Article { get; set; }
[DataMember]
public int Qty { get; set; }
}
view raw gistfile1.cs hosted with ❤ by GitHub

Using the same names and structure as the JSON-objects will make the transition very easy for the built-in Javascript deserializer we are going to use.
So, first of all go to the Azure portal and get the connection string to the queue. Click on the link at the bottom saying connection information.
getconnected
In the following popup you click the “copy to clipboard“-icon to the right of the “ACS Connection string” box. There, now you have the connection to the endpoint in your clipboard.

The connection string goes right where it says in the following snippet

string connectionString = "<your connectionstring here>";
var namespaceManager = NamespaceManager.CreateFromConnectionString(connectionString);
if (!namespaceManager.QueueExists("orderqueue"))
{
namespaceManager.CreateQueue("orderqueue");
}
var Client = QueueClient.CreateFromConnectionString(connectionString, "orderqueue");
view raw gistfile1.cs hosted with ❤ by GitHub

Here you get an instance of the NamespaceManager and then use it to check if the queue exists or, otherwise, create it. Orderqueue is the name we chose in the previous sample. Change to whatever your queue is called.

If everything is fine we go ahead and create the QueueClient pointing straight at our queue.

So, that’s all the setup needed.

Let’s go get some object then. Now, remember this example is overly simplified. It’s just blocking forever until a message arrives. It could very well that be you want some timeouts to act upon. The Client.Receive() optionally takes a TimeSpan for specifying the time to wait, just as in the MSMQ counterpart.

You perhaps also would like to check out the Async-methods and see if they better suit your needs. This sample is suitable for a Windows Service or any non-server application where you control the flow. I’m just using one thread for the loop so it’s fine.

while (true)
{
BrokeredMessage message = Client.Receive();
if (message != null)
{
try
{
var msgStream = message.GetBody<Stream>();
StreamReader sr = new StreamReader(msgStream);
var order = new System.Web.Script.Serialization.JavaScriptSerializer()
.Deserialize<Order>(sr.ReadToEnd());
if (order != null)
{
order.CreatedOn = message.EnqueuedTimeUtc;
//Act on order
}
message.Complete();
}
catch
{
message.DeadLetter();
}
}
}
view raw gistfile1.cs hosted with ❤ by GitHub

A few comments on the code. The BrokeredMessage contains a lot of metadata that you normally would like to extract. I’m just using the EnqueueTime as a sample. One interesting property is DeliveryCount. This is the number of time this message has been picked up for delivery but then just dropped (or at least not completed). SequenceNumber is another one. This can be used to check the ordering of the received messages if that is important in your application.

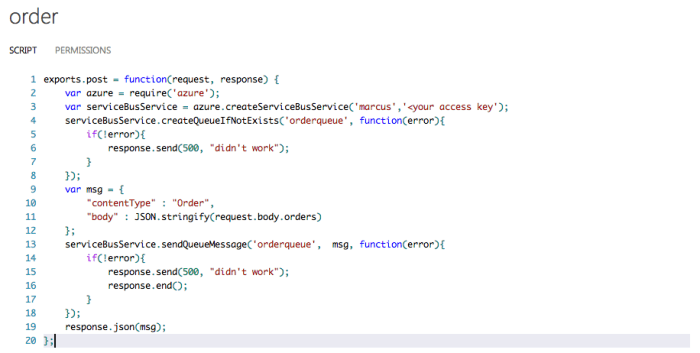
Ok. We have the message received alright. Since we didn’t go for the xml formatting but used JSON instead, we cannot use just a one-liner for the deserialization. Instead we take the body in the form of a Stream. Remember, the GetBody-method checks for the property “body” in the message
api4
As you see on line 11 we add a property named “body” to hold the user request.

Now with the stream at hand, we wrap it in a StreamReader just so we don’t need to fiddle around with byte arrays but instead just use the nifty ReadToEnd to get the whole payload as a string. This string we then pass into the JavaScript serializer and tell it to deserialize our string to an Order instance. If all this went ok we send a signal to the queue that we are done with the message and it’s ok to delete it. This is done with Complete().

An excerpt from the documentation:

“Completes the receive operation of a message and indicates that the message should be marked as processed and deleted.”

And in our catch we just send it to the deadletter queue where all the garbage ends up. A bit crude but in this sample it is fine.

A few notes at the end:
In the Azure Portal you can set the default behaviour of the queuelike the DeliveryCount I mentioned.
configurequeue
But also, and this is a tip, the lock duration. When you pull the message out of the queue to process it, you have the amount of time specified here at your disposal. After that time has elapsed the message is unlocked and any message.Complete() after that will fail. The DeliveryCount will be increased on the message and it is ready to be retrieved again (by you or another application). I’m mentioning this because during debugging you will probably want to increase this to a very large number to avoid problem.
Another tip to make this work is that you will have to install the Azure SDK to get it to compile. Nowadays this is done  preferably through NuGet.
Right-click on your project, select “Manage NuGet packages…” and search for “service”. There you will find the Azure Service Bus SDK. Click install and you are good to go.
servicebusnuget

How to store and use passwords in .NET

Edit: I uploaded a sample project to GitHub here. End Edit.

This is really one of my pet peeves. The last five years of stolen user accounts really got the community on its feet and the internet is oozing of advice of how to do this. Most of them well intended but badly implemented. Many of the bad ones use good practices but put them all in a blender. Not all algorithms are meant to be mixed. My version I intend to keep clean and use mainstream encryption.

First what parts are we talking about?

  1. Storing passwords
  2. Using passwords

What good is a stored password if you cannot use it afterwards. This, however, doesn’t mean that you ever should be able to recreate (or decrypt) the original password. Always compare scrambled password to scrambled password. And yes, the downside is that the user never can ask to get his password sent thru email in case they forgot. There’s more to this than just number crunching the hash. How to set the cookie properly is one place where good intentions crumble…

Anyway, this is my take…

I won’t go into to much detail of all the inner workings of hashing algorithms and such. But two things is important, salting and stretching. Both of which is taken care of when using the standard algorithms i .NET.

Here is a the code that generates the salt and the salted password

public static HashedPassword Generate(string password)
{
byte[] _salt = new byte[8];
using (RNGCryptoServiceProvider csp = new RNGCryptoServiceProvider())
{
csp.GetBytes(_salt);
}
byte[] _password = System.Text.Encoding.UTF8.GetBytes(password);
Rfc2898DeriveBytes k1 = new Rfc2898DeriveBytes(_password, _salt, 10000);
var _saltedPasswordHash = k1.GetBytes(24);
return new HashedPassword()
{
Password = Convert.ToBase64String(_saltedPasswordHash),
Salt = Convert.ToBase64String(_salt)
};
}
public struct HashedPassword
{
public string Password { get; set; }
public string Salt { get; set; }
}
view raw gistfile1.cs hosted with ❤ by GitHub

The key areas in this code is the use of RNGCryptoServiceProvider for generating the hash. Don’t create you own randomizer! And don’t ever use the same salt for all users and then hide it somewhere.

The main difference between a normal random number generator (RNG) and Cryptographically Secure Pseudo Random Number Generator (CSPRNG) – that’s a mouthful – lies in the predictability. Normal random numbers looks random but they really aren’t.

Ok, so now we have a salt. Next we are going to use Microsofts PBKDF2-implementation Rfc2898DeriveBytes to generate the key. The key in this case, is a hash that could be used as an parameter to other cryptographic stuff like the TripleDES encryption algorithm for encrypting a file.

It is worth noting that the key is not an encrypted version of the password.

A PBKDF (Password Based Key Derivation Function) is in it self a CSPRNG using the password and salt to create its Initialization Vector. After that you can use it to generate as many bytes as you like.

Sequential calls to GetBytes will not return the same bytes but the next bytes in the sequence.

Rfc2898DeriveBytes k1 = new Rfc2898DeriveBytes(_password, _salt, 10000);
var _saltedPasswordHash = k1.GetBytes(12);
Debug.WriteLine(Convert.ToBase64String(_saltedPasswordHash));
_saltedPasswordHash = k1.GetBytes(12);
Debug.WriteLine(Convert.ToBase64String(_saltedPasswordHash));
Rfc2898DeriveBytes k2 = new Rfc2898DeriveBytes(_password, _salt, 10000);
_saltedPasswordHash = k2.GetBytes(24);
Debug.WriteLine(Convert.ToBase64String(_saltedPasswordHash));
view raw gistfile1.cs hosted with ❤ by GitHub

This will generate this output:

b9oLeVK9RKNatt7X
G1MQqtPYCZnlabPR

b9oLeVK9RKNatt7XG1MQqtPYCZnlabPR

It is important to remember to also store the salt alongside with the password in your database. Why, you say, are you storing the salt? If the database get snatched the hacker also has the salt.

Yes correct, but first of all you need it when validating at login time and furthermore the salting makes it impossible to use rainbow tables.

The hacker has to calculate every possible password, salt it, hash it and then do the compare. Note that we also did stretching, we ran the hashing 10000 times.
When our user tries to log in again, we take his newly entered password and hash it using the same salt which we retrieved from the database.

public static bool Validate(string passwordHash, string saltHash, string enteredPassword)
{
byte[] _password = System.Text.Encoding.UTF8.GetBytes(enteredPassword);
Rfc2898DeriveBytes keyEntered = new Rfc2898DeriveBytes(_password, Convert.FromBase64String(saltHash), 10000);
return Convert.ToBase64String(keyEntered.GetBytes(24)) == passwordHash;
}
view raw Validate hosted with ❤ by GitHub

Using this is pretty straightforward

var keyAndSalt = Hash.Generator.Generate("P@ssword2013");
bool isEqual1 = Hash.Generator.Validate(keyAndSalt.Password, keyAndSalt.Salt, "Password2013");
//isEqual1 == false
bool isEqual2 = Hash.Generator.Validate(keyAndSalt.Password, keyAndSalt.Salt, "P@ssword2013");
//isEqual2 == true
view raw gistfile1.cs hosted with ❤ by GitHub

Now, as a final note about using the passwords:

Ok, so the user is now logged in to your system. The password is not stored anywhere and the hash is safe with you.

Somehow you have to remember during the length of the session that he or she is auhenticated. Normally you do this using browser cookies. Pretty easy to do, but if you just add it as a normal cookie it is susceptible to eavesdropping and hijacking of the session.

Three things to remember:

  • Always use https from the login screen and on. When the user clicks “login” you switch to https and stay there.
  • Set the authentication cookie to be Secure and HttpOnly to mitigate most of the threats like XSS.
    Secure means that it will only be sent when doing https calls. HttpOnly means the the cookie will only be used by the browser. Javascript cannot see it.
  • Do not use mixed content, i.e. you serve the html securely via https but some script och images get fetched through normal http. You will leak cookies! However, the steps above will normally stop this.